Thriving on a Budget: Backpacking South Island New Zealand (2024)
I have had the pleasure of visiting New Zealand numerous times, and it remains my favourite country. Almost like an annual ritual, I find myself drawn to this breathtaking part of the world. While I have explored bits and pieces of New Zealand on four to five occasions, my most recent adventure was an epic backpacking trip in the South Island. In this post, I will share the details of my 10-day itinerary, showcasing the highlights of this unforgettable journey. So, let’s go on a trip backpacking South Island New Zealand.
Page Contents
PIN for later reference | Backpacking South Island New Zealand
This article may contain affiliate links, meaning if you decide to purchase via my links, I may earn a commission at no additional cost to you. For complete information, please see our affiliate disclaimer here.
Disclaimers:
- The prices mentioned in the post are valid only at the time of publication. Ensure that you check the booking websites for up-to-date information and prices.
- My opinions and views are unbiased. If the post is a collaboration, then they are specifically mentioned.
- Ensure that you check the relevant websites for up-to-date information on COVID protocols.
- For any adventurous activities, please note that there is a risk that can be dangerous. Ensure you read the terms and conditions recommended by individual agencies and do them at your own risk.
- For visas, it is best to see the embassy website for changing rules.
- While using the recommended guides, auto-drivers or taxi drivers, do your due diligence and trust your judgement.
About South Island
The South Island, the larger of New Zealand’s two renowned islands, is undeniably a heavenly destination often referred to as paradise on Earth. Renowned for its glaciers, national parks, and mesmerizing southern lights, it stands out as one of the most beautiful places I have had the privilege to visit.
Officially recognised as Te Waipounamu, the South Island is a sought-after destination for adventurous travellers. It boasts numerous hiking trails and offers spectacular landscapes catering to nature enthusiasts and adventure seekers alike.
While I had previously spent a few days in Queenstown on the South Island, the idea of embarking on a road trip and backpacking adventure in this scenic region had always eluded me. Determined to make it happen, I seized the opportunity during one of my trips and embarked on an enriching 10-day backpacking journey through the captivating landscapes of the South Island.
South Island has plenty of stunning places, and there are many things you can add to the South Island bucket list.
Backpacking South Island Itinerary (Summary)
Here is the itinerary I adhered to during my backpacking expedition:
| Day # | Flight | Bus | Activity/ Tour | Stay |
|---|---|---|---|---|
| Day 0 | Sydney to Christchurch (Jetstar flight) | YHA Christchurch | ||
| Day 1 | Christchurch to Tekapo (Intercity Bus) | Hike to Mount John South Summit Walk Tekapo Star Gazing | Lakefront Backpackers Lodge | |
| Day 2 | Tekapo to Mount Cook via Twizel (The Cook Connection Bus) | Hike Mount Cook Village to Hooker River Bridge, Tasman Glacier River View and Blue Lake | Aoraki Mount Cook YHA | |
| Day 3 | Mount Cook to Tekapo via Twizel (The Cook Connection Bus) Tekapo to Wanaka via Tarras (Intercity Bus) | Wanaka Tree Star Gazing at Wanaka Tree | YHA Wanaka | |
| Day 4 | Wanaka to Queenstown (Intercity Bus) | Hike to Mount Iron Summit in Wanaka | Do not recommend – Nomads Queenstown Recommend – YHA Queenstown | |
| Day 5 | Queenstown to Dunedin (Intercity Bus) | Queenstown Gondola Queenstown Zipline | Central Backpackers Dunedin | |
| Day 6 | Dunedin to Gore (Intercity Bus) | Dunedin City and Coastal Tour | ||
| Day 6 (Cont.) | Gore to Invercargill (Intercity Bus) | Tuatara Lodge | ||
| Day 7 | Invercargill to Stewart Island (Flight) | Stewart Island Bus Tour | South Sea Hotel – Stewart Island | |
| Day 8 | Water Taxi to Ulva Island Hike to Post Office Bay Wharf to West Side Beach | |||
| Day 8 (Cont.) | Stewart Island to Invercargill (Flight) | Tuatara Lodge | ||
| Day 9 | Invercargill to Gore (Intercity Bus) | Invercargill City Tour | ||
| Day 9 (Cont.) | Gore to Christchurch (Intercity Bus) | JUCY Snooze Christchurch | ||
| Day 10 | Christchurch City Tour | |||
| Day 10 (Cont.) | Christchurch to Sydney (Flight) |
Backpacking South Island Detailed Itinerary
Day 0: Sydney to Christchurch
Note: This day is not included in the 10-day itinerary.
Commence your adventure by taking an evening Jetstar flight from Sydney to Christchurch. With New Zealand being 2 hours ahead of Sydney, you will arrive in Christchurch around midnight, and you can chose to stay at the Christchurch YHA.
Hostel details
- Christchurch YHA.
- 36, Hereford Street, Christchurch.
- +64 3379 9536.
Important Information
- For those travelling from Sydney, an evening flight proves to be the optimal choice, effectively saving the day in travel. This allows you to wrap up your work before taking the evening flight, minimising the need for an extra day of leave.
- Upon arrival at Christchurch Airport, the most economical way to reach the hostel is through the shuttle bus (details below). It’s a budget-friendly option for transportation.
- My accommodation preference always leans towards the Youth Hostel Association (YHA) hostels, renowned for their cleanliness and safety.
Transportation between Christchurch International Airport and Hostel
Upon landing in Christchurch at around 1 AM, concerns about transportation to my hostel (YHA Christchurch) lingered. I anticipated relying on taxis or Uber, which could potentially cost between NZD 40-80. A prior inquiry with the hostel reception reinforced this assumption.
However, upon exiting the airport, I noticed an ‘i’ board, indicative of an information centre. Approaching the attendant, I posed the same question I had asked the hostel reception earlier. To my surprise, the response was entirely different. The information centre informed me about shared shuttle services like Supershuttle, offering a door-to-door service that would drop me off directly at my hostel—for only NZD 25. Instantly, I became a fan.
My admiration for Supershuttle grew when:
- The shuttle driver was incredibly friendly, ensuring I disembarked right in front of my hostel. Despite a brief issue with the hostel gate code delaying my entry for 5 to 10 minutes, the driver patiently waited until I safely entered.
- As a fervent advocate of free Wi-Fi, discovering that the shuttle offered complimentary on-board Wi-Fi was the perfect icing on the cake.
How do you book?
- Supershuttle.co.nz
- 0800 748 885
- Shuttle stand outside Christchurch airport
Day 1: Christchurch to Tekapo
- Board an early morning Intercity NZ bus to Tekapo. The scenic journey through the countryside makes the early wake-up completely worthwhile.
- Alternatively, you can head to Kaikoura from Christchurch, where a myriad of activities await. Engage in unforgettable experiences like swimming with dolphins and partaking in a whale-watching scenic flight in the captivating setting of Kaikoura.
- Upon reaching Tekapo in the afternoon, seize the opportunity to embark on the Mount John South Summit hike straight from the hostel. While the hike spans a relatively short distance of 6 kilometers, be prepared for a steep ascent. The breathtaking views from the summit, however, make the effort completely worthwhile.
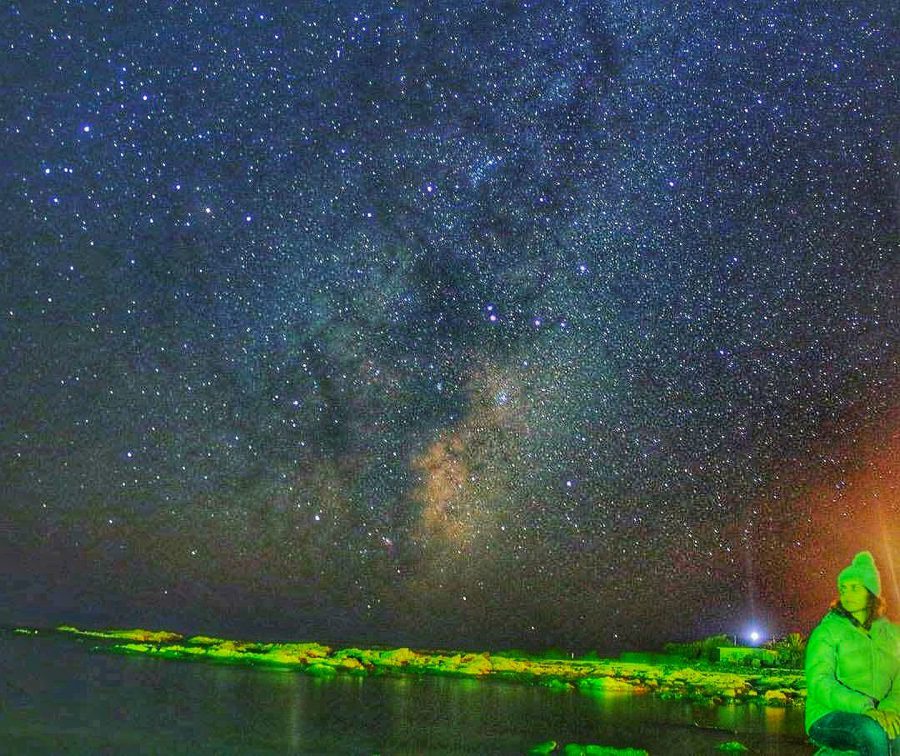
- In the evening, indulge in the unique experience of Tekapo Star Gazing, a one-of-a-kind tour that combines stargazing with hot pools, an exclusive offering in Tekapo as the only stargazing tour with hot springs in New Zealand.
- With a background of numerous stargazing tours, I found the stargazing aspect of the Tekapo Star Gazing tour somewhat less captivating. It seemed to focus more on the hot springs and relishing the celestial views rather than emphasizing the stargazing experience. This particular tour appears tailored for those who have a fondness for hot springs rather than individuals exclusively drawn to the stars. Locals strongly recommend the stargazing at Mount John Observatory as an essential experience, a regrettable omission on my part due to time constraints.
Mount John South Summit hiking details
Tekapo, a quaint town situated in the inland South Island of New Zealand, offers a must-do activity—hiking the South Summit of Mount John. This captivating journey commences at the hot springs, winding through lush green forests, ultimately leading to the summit and the observatory’s café.
Consider taking a guided tour to further explore the wonders of Mount John.
Undoubtedly, the views along the hike are spectacular, but it’s the breathtaking scenery at the summit that truly steals the show. The path unfolds panoramic vistas of the turquoise blue waters of Lake Tekapo, an experience truly worth savouring. From the summit, the sight of Lake Tekapo and Lake McGregor side by side is nothing short of splendid!
Logistics
- Total distance: approximately 6 kilometres.
- Total time: 1.5 to 2 hours (return).
- Type of walk: Return.
- Grade: Moderate (it is quite steep in some sections).
- Cost: FREE.
Note: Ensure you wear good hiking boots as in winters there could be ice and it can be very slippery.
Hostel details
- LakeFront Backpackers Lodge.
- 2, Lakeside Drive, Lake Tekapo.
- +64 3680 6825.
Important Information
- Make sure to secure your bookings for both Tekapo Star Gazing and Mount John Observatory well in advance, as these experiences tend to sell out rapidly.
- Note that Mount John Observatory operates exclusively on weekends. Plan accordingly to make the most of this unique opportunity.
Day 2: Tekapo to Mount Cook
Mount Cook stands as the tallest peak in New Zealand, and I had chosen to spend a night there. Regrettably, my visit coincided with persistent rainfall, as if the rain gods had decided to bless the region throughout my entire stay at Mount Cook.
Throughout my time in Mount Cook, the rain persisted without respite. Undeterred by the weather, I chose not to let it spoil my plans. Instead, I embarked on the Tasman Glacier View and Blue Lake hike, a decision that turned out to be quite awesome despite the inclement weather.
- Are you short on time? Then read what to do in Mount Cook if you just have one day.
- On a good day, you can do many things in Mount Cook.
Hike to Tasman Glacier view and Blue Lake walk details
There are numerous walks in Mount Cook, offering spectacular views of snow-capped mountains. However, on a rainy day, the options are limited to easier walks like the Tasman Glacier View and Blue Lake Walk to ensure the day isn’t wasted. With just one day in Mount Cook and persistent rain since my arrival, I had to make the most of the situation.
After reviewing the list of walks, I shortlisted two easy options conveniently located next to each other:
- Tasman Glacier View.
- Blue Lake.
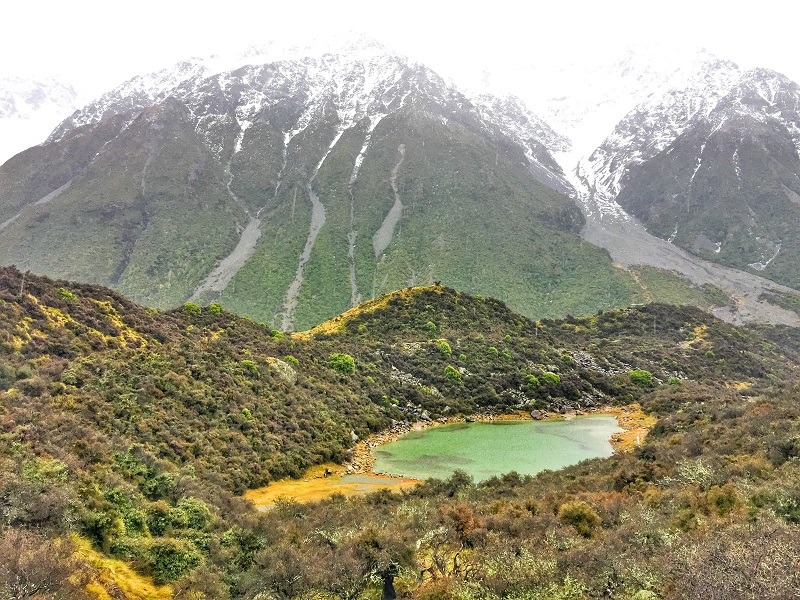
The Tasman Glacier Walk stood out as my favourite among the options. This approximately 1-hour return walk involves ascending steps to reach the summit. The vantage point offers a captivating view of icebergs melting on the lake. While the lake is typically frozen in winter, I was fortunate enough to witness floating ice, creating a breathtaking spectacle.
The Blue Lake, known for its supposed blue hue, presented an unexpected sight as the lakes appeared green. A nearby informational board elucidated the phenomenon, explaining that a lake appears blue when it is freshly melted from a glacier, while it takes on a green hue when filled with rainwater.

Logistics
- Total Distance: 3.5 kilometres.
- Time taken: 1 hour return.
- Cost: FREE.
I highly recommend these walks only if you find yourself pressed for time and want to make the most of a rainy day.
Hostel details
- Aoraki Mount Cook YHA.
- 1, Bowen Drive, Mt Cook.
- +64 3435 1820.
Important Information
- Local transportation in Mount Cook is best facilitated by a car. In my case, lacking a car, I opted for hitchhiking.
- For sustenance, it is advisable to carry ready-to-eat food options, considering the limited availability of restaurants in Mount Cook.
Day 3: Mount Cook to Wanaka
There are numerous small towns on the South Island, each offering its unique charm. Wanaka stands out as a picturesque town that is truly worth visiting, allowing you to revel in its spectacular landscapes.
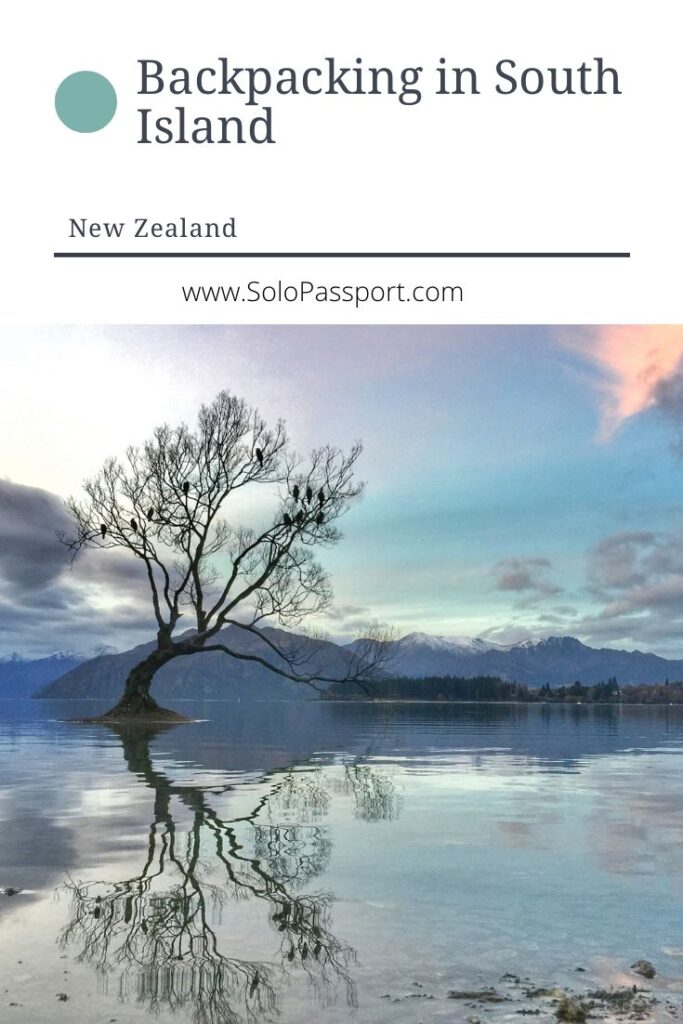
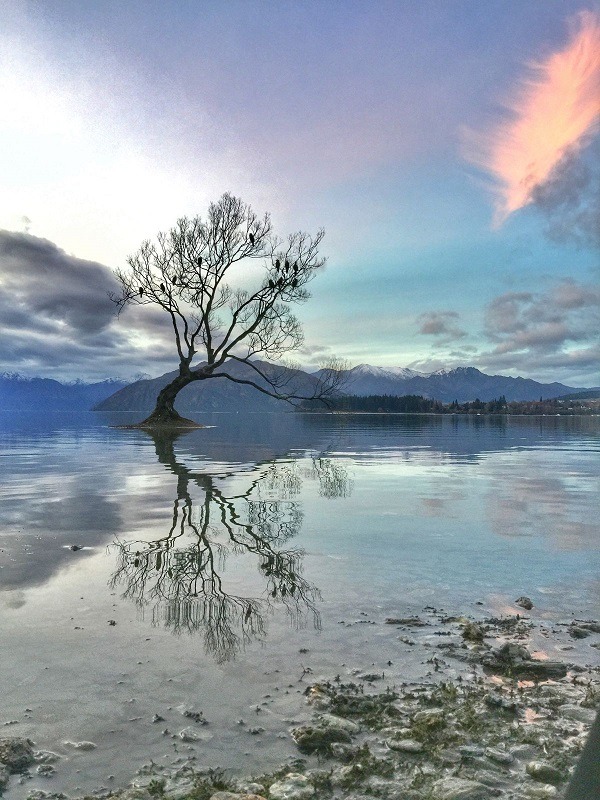
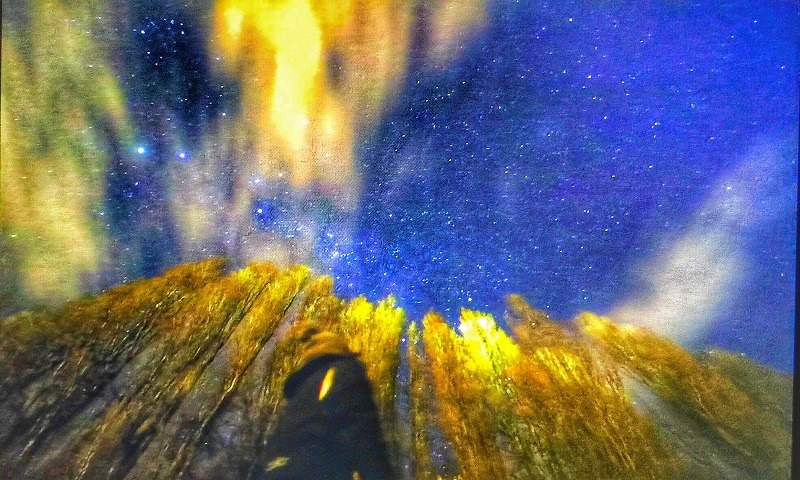
Upon reaching Wanaka in the evening, my first order of business after checking into the hostel was to visit the iconic Wanaka tree. It was truly a delight to witness the serene presence of this lone tree.
Eagerly anticipating the sunset near the Wanaka tree and the appearance of the Milky Way, I faced a bit of disappointment as clouds obstructed my view of the cosmic display. Unfortunately, luck was not on my side for capturing the Milky Way on that particular night. Wanaka tree is one of the places where you can see the Milky Way in New Zealand.
Hostel details
- Wanaka YHA.
- 94, Brownston Street, Wanaka.
- +64 3443 1880.
Day 4: Wanaka and Wanaka to Queenstown
In the morning, I embarked on a hike to the summit of Mount Iron to soak in the picturesque views of Wanaka. The effort was undoubtedly worth it!
Later in the evening, I found myself in Queenstown, where I decided to try the renowned Fergburger. This eatery is one of the most famous food options in Queenstown, often characterized by an extensive queue. While the burger was undoubtedly tasty, if you were to ask me whether it was worth the 30-minute wait in line, I would have to say no.
Mount Iron Loop Hiking details
For panoramic views of Lake Wanaka and the town itself, the Mount Iron Summit is an absolute must-visit. Standing at approximately 573 meters high, Mount Iron is one of the prominent mountains that grace the skyline and is easily visible from Wanaka town.
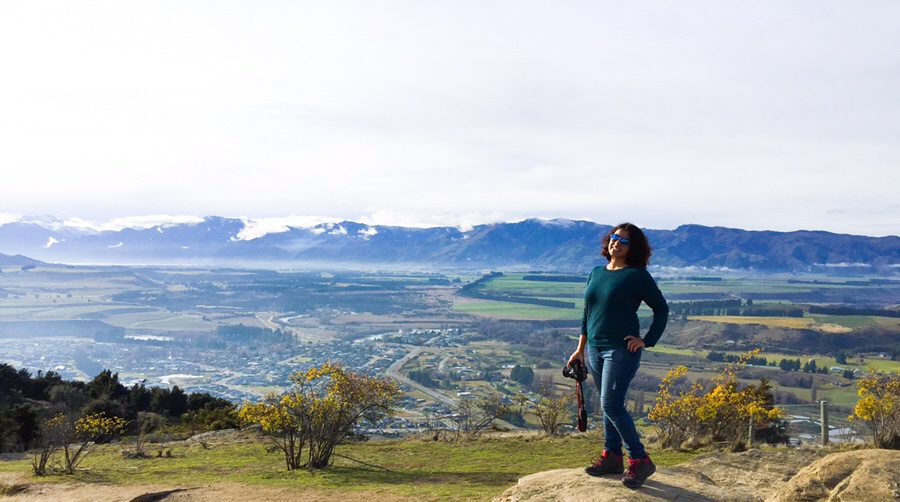
The car park, situated roughly 2 kilometers from the town center, serves as the starting point for the hike.
During winter, the walk unfolds picturesque views of Lake Wanaka complemented by the snow-capped mountains in the backdrop, a truly stunning sight! While certain sections of the hike are steep, the reward awaits at the summit, making it a worthwhile endeavour.
Logistics
- Distance: Approximately 5 kilometres loop walk.
- Total time: 1.5 hours return.
- Type of walk: loop.
- Grade: Medium, as the walk does have steep sections.
- Cost: FREE.
Hostel details
- Nomads Queenstown. I will never stay at this hostel. This was extremely crowded and dirty.
- 5 – 11, Church Street, Queenstown.
- +64 3441 3922.
- Highly recommend YHA Queenstown.
Day 5: Queenstown & Queenstown to Dunedin
I have a deep affection for Queenstown, undoubtedly one of my favourite places in New Zealand.
In the morning, I indulged in the exhilarating 4-line ziplining experience in Queenstown—a thrilling activity that I wholeheartedly recommend. Queenstown, renowned for its adventurous spirit, offers a plethora of activities such as bungy jumping, swinging, and jet skiing, all of which are truly amazing.
The remainder of the day was dedicated to travelling to Dunedin by bus.
4 line ziplining details
Queenstown is the ultimate destination for adventure enthusiasts and adrenaline junkies. From bungee jumping to skydiving to jetboating, Queenstown offers a diverse range of thrilling activities. Undoubtedly, this is my favourite place in New Zealand, thanks to its incredible vibe and atmosphere.
Having previously experienced bungee jumping in Queenstown and skydived twice in other locations, this time, I opted for the exhilarating zip line. It proved to be a super fun way to spend a few hours in the adventure capital of New Zealand.
I booked the tour through Viator:
- Ziptrek Eco Adventures:
- Cost: AUD 89.83 (USD 67.99) + NZD 44 or AUD 40.73 (USD 30.82).
- Booked on Viator.
The Ziplining tour does not include the Gondola ride, which is necessary to ascend the mountain. The check-in point for the Zipline is located on the mountain near the Skyline. For Gondola ride bookings:
- Queenstown Gandola:
- Cost: NZD 39 or AUD 36.11 (USD 27.31).
- Booked at the bottom of Gandola.
Note: If you prefer, you can opt to hike up the mountain, which takes approximately 45 minutes to 1 hour and is relatively steep.
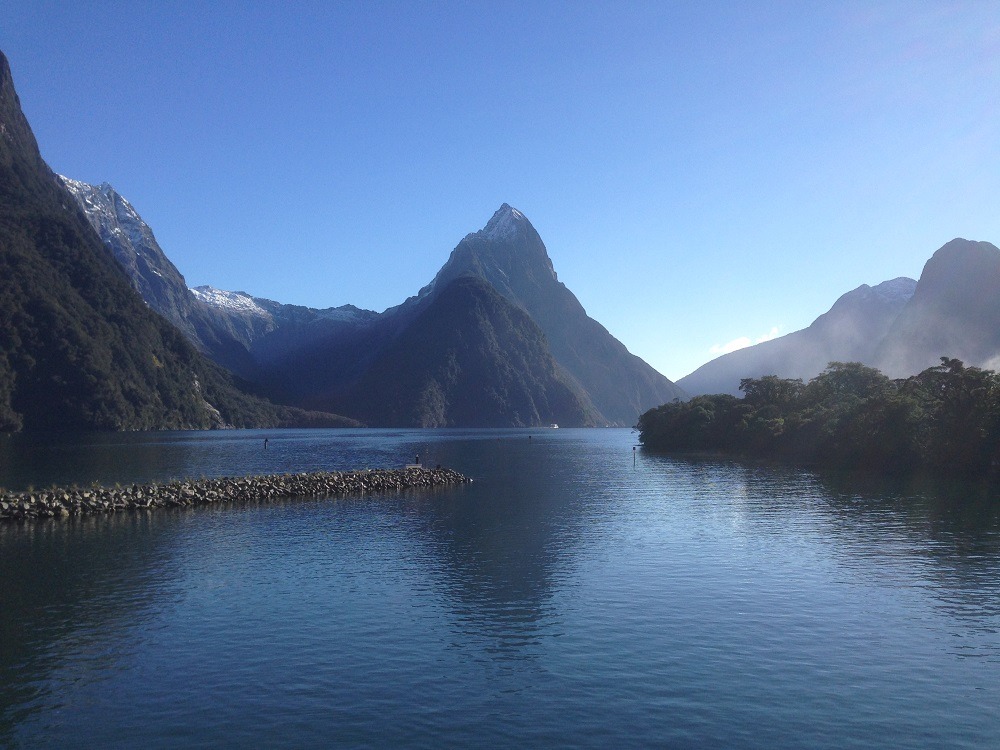
The zip line tour I booked featured a 4-line course, with each line progressively longer than the previous one. The final zip line, being the longest, offered the most spectacular view of Lake Wakatipu.
In our group of three, our guides Nara and Declan took excellent care of us. They ensured the safety of our harnesses and, most importantly, our comfort every time we ziplined. It was truly a memorable experience, and I wholeheartedly recommend it.
Hostel details
- Central Backpackers Dunedin.
- 243, Moray Place, Dunedin.
- +64 3477 9985.
Day 6: Dunedin and Dunedin to Invercargill
During the first half of the day, I explored the renowned landmarks of Dunedin and found myself quite enamoured with the city. Dunedin is a city known for its rich Scottish heritage, Victorian and Edwardian architecture, and vibrant cultural scene.
The rest of the day was dedicated to travelling to Invercargill.
Hostel details
- Tuatara Lodge.
- 32, Dee Street, P.O. Box 960, Invercargill.
- +64 3214 0954.
Day 7: Invercargill to Stewart Island
Were you aware that New Zealand boasts a third, albeit smaller, island that doesn’t quite match the size of the North and South Islands? This third island goes by the name Stewart Island.
I dedicated an entire day to exploring the charms of Stewart Island. Stewart Island is a tranquil and pristine destination known for its natural beauty and diverse wildlife.
Hostel details
- South Sea Hotel – Stewart Island.
- Elgin Terrace, Half Moon Bay.
- +64 3219 1059.
Day 8: Ulva Island and Stewart Island to Invercargill
On this day, explore Ulva Island, which is a 15 minutes water taxi ride from Stewart Island. I was transported to Ulva Island in the morning. It might sound unbelievable, but I was the sole inhabitant of this island throughout my visit.
I dedicated approximately 2 hours to exploring Ulva before returning to Stewart Island to catch a flight to Invercargill.
Hostel details
- Tuatara Lodge.
- 30 – 32, Dee Street, P.O. Box 960, Invercargill.
- +64 3214 0954.
Day 9: Invercargill to Christchurch
The entirety of my day was consumed by bus travel as I journeyed from Invercargill to Christchurch.
Hostel details
- JUCY Snooze Christchurch.
- 5, Peter Leeming Road, Christchurch Airport, Christchurch.
- +64 3903 0070.
Jucy Snooze Christchurch
I came across Jucy Snooze pods during my search for hostels near Christchurch airport, and I must admit it’s undoubtedly one of the coolest places I’ve ever stayed at. Just a brief 10-minute walk from the international airport, the entire check-in and check-out process is automated, making it a remarkably simple experience. All that’s needed for check-in is pre-booking and scanning a photo identity (passport).
This place captured my admiration, and I wholeheartedly recommend it.
Booking details
- Jucy Snooze Pod.
- Address: 5, Peter Leeming Road, Christchurch Airport, Christchurch, New Zealand.
- Phone Number: +6439030070.
- A pod costs only about NZD 33 or AUD 30.4 (USD 23) in an 8 shared female dorm.
Day 10: Christchurch to Sydney
My departure from Christchurch to Sydney was scheduled for the early morning.
My Route map
Expenses
For a 10-day backpacking trip with lots of activities, the total expenses were AUD 1,951.81.
Flights
Between Sydney and Christchurch
- Frequent flights fly between Sydney and Christchurch.
- Jetstar is definitely the most economical airline.
- Sydney to Christchurch return: Cost – AUD 409.34 (including 15Kgs of Check-in baggage) (USD 310).
Between Invercargill – Stewart Island
- Stewart Island Flights run flights between Invercargill and Stewart Island.
- The cost of return flights and two sightseeing tours is AUD 282 (USD 214).
Local Transportation
- Christchurch airport transfer – Cost: NZD 25 or AUD 23.1 (USD 17.6).
- Stewart Island Car hire – Cost: NZD 120 or AUD 111.79 (USD 83.45).
- Invercargill airport shuttle – Cost: NZD 15 or AUD 13.9 (USD 11.4).
Intercity travel
- I traveled mostly by bus. Intercity NZ runs frequent buses between the cities and towns. But one can also hire a campervan to travel within the island, read Cheap New Zealand Campervan Hire for details on how to get the best and cheap campervans.
| Route | Route (Cont..) | Provider | Cost in NZD | Cost in AUD | Cost in USD |
| Christchurch to Tekapo | Intercity | 38.99 | 35.96 | 27.2 | |
| Tekapo to Twizel to Mount Cook | The Cook Connection | 37.5 | 34.59 | 26.18 | |
| Mount Cook to Twizel to Tekapo | The Cook Connection | Included in above | Included in above | Included in above | |
| Tekapo to Tarras | Tarras to Wanaka | Intercity | 68.99 | 63.63 | 48.17 |
| Wanaka YHA to Queenstown | Intercity | 32.99 | 30.42 | 23.03 | |
| Queenstown to Dunedin | Intercity | 4.99 | 4.6 | 3.48 | |
| Dunedin to Gore | Gore to Invercargill | Intercity | 25.99 | 23.97 | 18.14 |
| Invercargill to Gore | Gore to Christchurch | Intercity | 39.99 | 36.88 | 27.91 |
Hostels
Below are the hostels I stayed in:
| Name | Address | 2, Lakeside Drive, Lake Tekapo; +6436806825 | Cost per night (NZD) | Cost per night (AUD) | Cost per night (USD) |
| Christchurch YHA | 36, Hereford Street, Christchurch; +6433799536 | 6 Bed Share Female | 40.5 | 37.3 | 28.2 |
| LakeFront Backpackers Lodge | 2, Lakeside drive, Lake Tekapo; +6436806825 | 6 Bed Share Mixed | 37 | 34 | 26 |
| Aoraki Mount Cook YHA | 1, Bowen Drive, Mount Cook; +6434351820 | 8 Bed Share Female | 34.2 | 31.5 | 23.9 |
| Wanaka YHA | 94, Brownston Street, Wanaka; +6434431880 | 4 Bed Share Female | 36.9 | 34 | 25.8 |
| Nomads Queenstown Recommended Option – YHA Queenstown | 5 – 11, Church Street, Queenstown; +6434413922 | 6 Bed Share Female | 41 | 37.8 | 28.62 |
| Central Backpackers Dunedin | 243, Moray Place, Dunedin; +6434779985 | 8 Bed Share Female | 28 | 25.8 | 19.5 |
| Tuatara Lodge | 32, Dee Street, P.O. Box 960, Invercargill; +6432140954 | 4 Bed Share Mixed | 32 | 29.5 | 22.3 |
| South Sea Hotel – Stewart Island | Elgin Terrace, Half Moon Bay; +6432191059 | Single Room | 75 | 69.1 | 52.3 |
| Tuatara Lodge | 30 – 32, Dee Street, P.O. Box 960, Invercargill; +6432140954 | 4 Bed Share Mixed | 32 | 29.5 | 22.3 |
| JUCY Snooze Christchurch | 5, Peter Leeming Road, Christchurch Airport, Christchurch, New Zealand; +6439030070 | 8 Bed Share Female | 33 | 30.4 | 23 |
Activities
Tekapo Star Gazing
- Cost: AUD 85.10 (USD 64.41).
- Booked on Viator.
Queenstown Zipline tour
- Cost: AUD 89.83 (USD 67.99) + NZD 44 or AUD 40.73 (USD 30.82).
- Booked on Viator.
Queenstown Gondola
- Cost: NZD 39 or AUD 36.11 (USD 27.31).
- Booked at the bottom of the Gondola.
Dunedin City and Coastal Tour
- Cost: AUD 80.38 (USD 60.84).
- Booked on Viator.
Larnach Castle entrance
- Cost: NZD 31 or AUD 28.91 (USD 21.62).
- Booked at the Castle gate.
Water Taxi to Ulva Island & Stewart Island Bus Tour
- Cost: Included with the flights.
- Booked along with the flights’ add-on.
Tip: Always Ensure you call the tour operators one day before to confirm your bookings. And also mention to them the places you are staying in, sometimes they pick you up from your hostels.
Food
- I carried 10 packets of ready-to-eat food; the cost was AUD 18 (USD 13.64).
- Note: Do not forget to declare this at the airport.
- I also ate food at various restaurants, costing about NZD 150 or AUD 139.05 (USD 113.7).
- Stewart Island was the most expensive place for food.
SIM and Wi-Fi
- Optus Australia is my phone provider. Having a prepaid connection automatically qualifies me for International roaming. So, I did not buy a separate SIM card.
- Generally, at hostels, the Wi-Fi is free. However, some hostels I stayed at, did charge me for Wi-Fi connection. The cost was around NZD 5 or AUD 4.63 (USD 3.79).
Is Backpacking South Island in New Zealand safe for solo female travellers?
New Zealand stands out as one of the safest countries I’ve explored as a solo female traveller. Renowned for its tourism and overall safety, my answer is a definite yes! Nevertheless, as with any country globally, exercising caution, particularly at night, and relying on your instincts is always advisable.
Closing Notes
As highlighted earlier, my backpacking journey across the South Island stands out as one of my most epic adventures to date. The experience was truly remarkable, offering an incredibly enjoyable time as I explored the diverse and breathtaking landscapes of this captivating region. The journey was filled with awe-inspiring moments, from hiking to stunning summits to embracing the thrill of adventure activities. Every step of the way, the South Island unfolded its wonders, leaving an indelible mark on my travel memories. The unique charm, natural beauty, and adventure-packed escapades combined to create an unforgettable chapter in my travel chronicles.
How can you support me?
You know how much I love coffee, so you can buy me a coffee – Buy me Coffee!
Or you can purchase from one of the below travel resources without any extra charge to you:
Travel Resources
Book your flight on Skyscanner.com or Trip.com
Reserve your accommodation on Stay22
Reserve your stay at a hostel on HostelWorld
Use RentalCars or DiscoverCars for hiring self-driven cars
Book your tours and travels or purchase tickets on Viator or GetYourGuide
For a universal SIM card, use DrimSim
Buy comprehensive travel insurance on SafetyWing and WorldNomads
If you liked this article and if it was helpful in your planning or traveling, do share, tweet, or pin this post.
Follow me on Instagram | Facebook | YouTube | Twitter | LinkedIn
Do you have a question? Do you want any suggestions and tips for travel, hikes, and scuba dives? Use the Subscription box below to sign up and get updates by email.


